Tuesday, October 15, 2013

An Appositively Wonderful Grammar Lesson!

Teaching grammar can be quite a challenge when you are trying to incorporate it within a literature unit. Because most literature textbooks simply stick to teaching figurative language and comprehension tools, grammar gets left on an island all alone. While in graduate school, I took a methods course that taught me how to take most grammar lessons and apply it to the literature that I teach each year (thanks, Dr. Barkley!). One of my favorite grammar activities to include in my literature units is teaching appositive phrases. 

What is an appositive phrase? 

An appositive is a noun or noun phrase placed next to another noun and accentuates that noun by providing more information. 


How do I teach it within my literature units? 

Because my students are reading Fahrenheit 451, I used this lesson just the other day as a mini-refresher session. 

I start off by giving my students 2 questions that they have to answer using complete sentences. 

1. Who is Guy Montag? 
2. Who is Guy's wife? 

1. Guy Montag is a fireman. 
2. Guy is married to Mildred. 

What is next? 

The students use the answer to those questions to create an appositive phrase. They combine their answers to make one complete sentence. 

Guy Montag, a fireman, is married to Mildred. 

The students now have a sentence that includes an appositive phrase. It is important to explain that an appositive phrase must exist within a complete sentence. Have the students check their work by removing the appositive phrase and make sure that the sentence is complete without the appositive phrase. 


Thursday, October 10, 2013

Slop, Slop, Sloppy Joe!

Every once in a while, I want to recreate one of my favorite dishes from my childhood: the sloppy joe! My mom used the ancient recipe of the "manwhich" meal and I loved every bite! When I got older, I decided I needed to bring back this modern delacacy! While I love a quick and easy meal, I don't like using a lot of processed foods such as Hamburger Helper or Manwhich, so I began my search for a homemade sloppy joe recipe. My search ended when I discovered The Pioneer Woman! I love, love, love her blog, her recipes, her ideas! Her recipes are so very brilliant, yet accessible to the inexperienced chef. I haven't made these in a while, but I am definitely putting this on my menu for next week. Happy cooking! 

Ingredients: 

2 Tbsp of butter
2 1/2 lb of ground beef
1/2 large whole onion diced
1 large green bell pepper, diced
5 cloves garlic, minced
1 1/2 cup ketchup
1 cup of water
2 tbsp brown sugar
2 tsp chili powder
1/2 tsp red pepper flakes
Worcestershire sauce (to taste)
2 tbsp tomato paste (optional)
Salt to taste
Freshly ground black pepper to taste
Buns
Butter

Directions: 
Add butter to a large skillet or dutch oven over medium high heat. Add ground beef and cook until brown. Drain most of the fat and discard. 

Add onions, green pepper, and garlic. Cook for a few minutes or until the vegetables begin to get soft. 

Add ketchup, brown sugar, chili pepper, and water. Stir to combine and let simmer for 15 minutes. Add salt and pepper to taste, along with the tomato paste, Worcestershire sauce and tabasco if desired. Taste and add seasonings as needed. 

Spread buns withe butter on a griddle or skillet. You can also toast them! Spoon meat mixture onto the buns and top with cheese if you like! 

http://thepioneerwoman.com/cooking/2010/04/sloppy-joes/ 


Wednesday, October 9, 2013

Pinata-palooza!

I taught Spanish and English for the first 6 years of my teaching career. I loved everything about teaching Spanish, but especially the culture projects that I would assign for each unit. While I never perfected the art of the pinata, I did love painting my ceiling tiles to look like the flags of Spanish speaking countries. 

At Sardis High School, we have a great Spanish teacher, Ashley Lee. She is full of energy and great ideas! One of the biggest projects in her classroom each fall is the pinata project. Two weeks before Homecoming week, she explains to the students the rules and rubrics for the pinata. The students are to create the "shell" for the pinata at home. The week of Homecoming (because it is sooo chaotic), she sets up tables in her classroom for the modge-podge application part of the pinata process. Her students bring their pinatas to school and work on them in class for the entire week. The modge-podge makes a little bit of a mess, but the kids have a great time! After the modge-podge dries, the students take their pinata home for the final preparations. The students are given one week to cover it in paper/glitter/paint. They bring it back to school and it hangs in Mrs. Lee's room proudly! Mrs. Lee uses a rubric to score the pinatas (it is a 200 point project). The pinatas hang proudly in her room for the entire year. At the end of the year, the students decide if they want to smash their pinatas during a Spanish-themed party. They are such beautiful creations-too pretty to break! Here are some of my favorites: 


Tuesday, October 8, 2013

Back to Blogging!

The past couple of weeks have been quite chaotic and full of grading paper after paper for my AP Language classes. In addition to my teaching gig at Sardis, I also teach for Jacksonville State University. I have taught a number of classes for the Department of Education and Professional Studies, but this semester I am teaching a hybrid class called Introduction to Education. This course is required for all Education majors at JSU. It is a really fun class that meets only four times a semester, because the coursework is mostly done online. Last week, I met with my students at midterm so that I could evaluate their progress. As a result of these after-school-meetings, I got way behind on blogging. Hopefully, I can stay caught up with fun classroom ideas and recipes!

I am so thankful that I married a man that knows his way around the kitchen. Any time I need help cooking, I can always ask Justin to step in and assist me with whatever I am making. This past weekend my family hosted a birthday/retirement party for a family friend, Miss Ivy Mordecai. After working as a librarian for over 30 years, she decided to retire. My sister, Holli, and I are usually the party-planners for any family event, so we decided to usher in fall by having a soup and sandwich themed menu. We served 3 different types of soup along with cornbread muffins made by may Aunt Rob (she is also an amazing cook!), cheese dip, ham and cheese sliders, and some of Holli's amazing desserts. I was in charge of making baked potato soup and ham and cheese sliders. My baked potato soup recipe was a little more involved than just one of my easy crock pot recipes, so I had to call on Justin to make the ham and cheese sliders. He did a great job! Here are the recipes for the baked potato soup and ham and cheese sliders: 


Baked Potato Soup

6 large baked potatoes, peeled and diced (I cooked mine for 3 hours on high in my crock pot. Make sure you wrap them in aluminum foil.)
1 stick of butter
1 onion chopped
1/2 cup plain flour (you made need a little more than this along the way)
3 (14.5 oz) cans of chicken broth
1 t dried parsley flakes
2 cups of Half and Half (can be fat free and it won't change the taste)
1 cup sour cream
1 cup sharp cheddar cheese
Bacon bits
Salt and pepper

Melt butter, add onions and cook until tender. Stir in flour and cook for 1 minute stirring constantly. Gradually add chicken broth and continue stirring until thick and bubbly. (You might have to add a little more flour so that the mixture thickens) Put in diced potatos, parsley, and half and half. Cook for 10 minutes. Add cheese, sour cream, and bacon bits before serving. 


Ham and Cheese Sliders


Ingredients:

1 1/2 lb of deli ham, thinly sliced
1/2 lb of baby Swiss cheese
24 Hawaiin King rolls
1/2 cup of butter
2 tbsp of mustard
1 tbsp worcetershire sauce
2 tbsp of poppy seeds
2 tbsp of chopped onion (I used a half package of dried onion soup mix)

Set oven to 375. Melt butter and add poppyseed, onion, and worcetershire sauce. Without separating the rools, slice them horizontally. Spread both sides evenly with butter mixture. Fill evenly with ham and cheese. Let them sit for 10 minutes before baking. Bake for 15 minutes or until cheese is melted. 

These are soooo good! 

Tuesday, October 1, 2013

Quick and Easy Beef Tips

As the semester progresses, I find myself spending less time in the kitchen and more time grading essays and studying rhetorical devices. I knew that AP Language was going to be a tough class to teach, but I didn't know that it would feel like my first year of teaching all over again. I have almost used up all of my freezer meals that I created at the beginning of the year, so I am always looking for something easy to throw into my crock pot until I have a free Saturday to make more freezer-ready meals (I am planning to make new recipes this Saturday!). I decided to start our Monday off with one of our favorite meals: beef tips and rice. While my sister always says that beef tips look like dogfood, they sure don't taste like dogfood (I am assuming!). Here is my quick and easy recipe: 

Ingredients: 
2 lbs of beef tips
1 can French onion soup
1 can golden mushroom soup
1 package of dry onion mix
2 tablespoons of flour

Directions: 
Place the beef tips in the crock pot. Pour flour all over the beef to create a light coating. Pour remaining ingredients over the beef tips and cook on low for 4-6 hours. (I usually cook mine for 5 hours.)


Friday, September 27, 2013

Chicken Burrito Bowls

I love cooking Mexican food, because it is generally very easy to make a yummy dish. I also love Mexican food, because it involves cheese. The recipe that I am sharing today is my interpretation of Moe's burrito bowls. There is not a Moe's in Gadsden, so I like to invent recipes that taste similar to their dishes. Sometimes I fail, but I think this recipe turned out quite delicious. Enjoy!

Ingredients: 
2 cups of corn (frozen or canned)
1 can of black beans rinsed and drained
1 cup of chunky salsa divided (my favorite salsa is On the Border) 
1 clove of garlic (or garlic powder works just as well)
1/2 teaspoon of ground cumin
4 boneless skinless chicken breast 
1 package (8 oz) of cream cheese, cubed
Hot cooked rice
Shredded cheddar cheese

Directions: 
Combine corn, beans, 1/2 cup salsa, garlic and cumin in the crock pot. Arrange the chicken breasts on top and pour the remaining salsa over the chicken. Cook on high for 2 to 3 hours or on low for for 4 to 6 hours. Make sure that the chicken is cooked and tender. Remove chicken and shread/cube. Return the chicken to the crock pot along with the cubed cream cheese. Cook on high until the cream cheese is melted. Spoon the chicken and mixture over rice and top of cheese! 


Thursday, September 26, 2013

You're a Poet and Didn't Know It

Writing poetry is one of the hardest concepts to teach in the high school classroom. Many of my students are intimidated by the idea of creating a poem that has meaning and doesn't involve "roses are red, violets are blue." A few years ago, I stumbled across the classic "I Am" poetry template that can be easily adapted for any secondary grade. I began using this template at the beginning of the school year by having my students write the poem about themselves. I would then keep the poem until the end of the year and return it to them so that they can see how much they grow in character and maturity over the course of the school year. 

After using this poem for a simple creative writing idea, I decided to take it one step further and use it as a form of character analysis. I have my students select one character from the novel/short story that we are reading. They use the "I Am" template to create a poem from the perspective of the character of their choice. The students usually blow me away with this activity, because they begin synthesizing character actions and development. I really enjoy using this project when teaching To Kill a Mockingbird because the students get to see Scout, Jem and Dill grow up throughout the book. I have included some of my student samples below along with the "I Am" template. Happy writing! 


Wednesday, September 25, 2013

Putting "art" in Language Arts

I love to incorporate art in my classroom. If I had been blessed with the gift of drawing or painting, I would have chosen to teach art all day long. Unfortunately, I am not a Picasso or even a good scribbler, so I have to step aside and let my students be the real artists in my classroom. One of the activites I love to use in my classroom is a project called "Imagery Sketch." Whenever my students are reading a novel in my class, they are asked to create 3 imagery sketches. The students find passages or elements within the story and illustrate it. They have to create one for the beginning, the middle, and the end of the book. Right now, my 10th grade English classes are reading Fahrenheit 451 in conjunction with Banned Books week. Anyone who has ever read this book knows that Bradbury incorporates imagery unlike any other author. His descriptions are specific and easy to interpret. I have included some photos of my student's sketches from the first portion of the novel. I hope you enjoy! 


Monday, September 23, 2013

Monday's Menu

What a wonderful weekend! I think I have finally recovered from last week's Homecoming activities at school and I can finally resume my normal classroom routines. It was a fun week, but I am very glad that we can get back on track. In an effort to be productive, I woke up early yesterday morning and prepared our dinner for tonight before we left for church. I was in the mood for something Italian, so I jumped over to my very best friend's,Catherine, blog- the Bailey Daily's- and borrowed her recipe for stuffed shells. This is by far one of the easiest and most delicious recipes I have ever used. It makes quite a large portion, so I like to freeze some of the shells for later. It is also a great dish to share with friends that have had a baby or surgery, because it is so yummy! Happy cooking! 

Ingredients: 

1 box jumbo shells (one box makes 2 recipes, so you might want to double the rest of the ingredients)
1/2 lb ground Italian flavored sausage
1 clove of garlic
1 cup shredded mozzarella cheese
1/2 package of a 10 oz package of frozen spinach thawed
1/2 cup ricotta cheese
1/4 cup grated parmesean cheese
1/2 teaspoon dried Italian seasoning
1 teaspoon lemon juice
1 egg beaten
1 jar spaghetti sauce
2 tablespoons of Parmesan cheese for topping

Directions: 
Cook shells according to package directions. Drain well and rinse with cold water. Cook sausage with garlic in a large sauce pan. Be sure to break up sausage with a spoon or spatula. Remove from heat. Add mozzarella cheese, spinach, ricotta cheese, 1/4 cup Parmesan cheese, Italian seasoning, lemon juice and egg. Carefully spoon mixture into cooked shells. Place shells in a 13x9 dish. Pour spaghetti sauce over shells. Bake at 350 for 30-35 minutes or until heated throughout. Sprinkle with shredded Parmesan cheese. 


Thursday, September 19, 2013

Behind on Blogging

It is Homecoming week at Sardis High School! It is also progress report week, so I have been playing catch-up every evening instead of blogging. What a slacker I am! AP Language essays and exams take me forever to grade, so my stacks of essays pile up in a short amount of time. I have to keep reminding myself that Rome wasn't built in a day, everything will be fine. The Type A personality within me fights against this laid-back approach. Because it is Homecoming week, our students are given the opportunity to participate in dress-up days, float decorating, and door decorating. My 5th period pre-AP class was responsible for my door. They decided to go with the Fahrenheit 451 theme and feature burning books on our design. They did a great job! I am going to share multiple displays! Enjoy! 


Monday, September 16, 2013

Monday Roast

Justin and I traveled to College Station, Texas this weekend to watch Alabama defeat the Aggies. It was a super fun weekend, but not a relaxing one! For the past 4 seasons, we have traveled to some amazing away games with our dear friends, Catherine and Forrest Bailey. We always have a great time and so far, we have only traveled to one game where Alabama lost (AL/LSU). This past weekend was a glorious victory, but it left all of us quite exhausted.


 As a result of my Monday fatigue, I don't want to spend a lot of time in the kitchen this evening, so I am throwing a roast in the crock pot! I have decided to plan this week's menu around this beautiful roast. Here is the recipe that I am using this morning: 

Quick and Easy Crock pot Roast: 

Ingredients: 
1 3-4lb roast (chuck, round, angus- any of these!)
1 can cream of mushroom soup
1 pckg dry French onion soup mix
1 c water

Directions: 

Put all ingredients in the crock pot and cook for 6-7 hours on low. How easy is that??

Have a great Monday!! 

Friday, September 13, 2013

Quick and Easy Quesadillas!

Even though it is almost the middle of September, I still feel as though the first day of school was yesterday! I am constantly playing "catch-up" with all things school-related and I am pretty sure my daily to-do lists will never actually get finished in one day. I just have to remind myself that Rome was not built in a day. 

While I am trying to play catch-up, I am also trying to maintain an orderly home and an organized menu for each week. As I have said before, I really enjoy cooking and planning meals. Justin is quite easy to please as he eats almost everything, so I am able to experiment in my crock pot or oven frequently. Recently, I decided I wanted to try my hand at creating a Mexican crock pot recipe, so I got out some of my most favorite ingredients and put them in my magical crock pot and ta-da!! We had chicken quesadillas! Try this out: 

Crock Pot Ingredients: 

3-4 chicken breasts (Because there are only 2 of us, I usually just cook 3)
1 green bell pepper
1 red bell pepper
1/2 onion
1 can Rotel
1/2 cup of water or chicken broth
1 package of fajita or Mexican seasoning (I like using MSG free products like McCormick's seasoning)


Quesadilla Ingredients: 

Whole Wheat Tortillas
Cheese of your choice
Olive oil spray
Salsa 


Directions: 

Place chicken breasts (frozen or thawed)Slice up bell peppers and onions, place them on top of the chicken. Pour Rotel, chicken broth or water, and seasoning onto the vegetable/chicken ingredients. Cook on low for 6 hours for frozen chicken or 4 hours for thawed chicken. After everything is cooked, place in a large bowl and shred the chicken and larger pieces of bell pepper or onions using a fork. 

To make the quesadillas, you can use either a regular frying pan on the stove or a griddle. Take one tortilla and spray olive oil on each side (this allows the tortilla to be a little crunchy). Place tortilla on griddle or pan and allow it to heat for 1-2 minutes. Spread chicken/veg mixture onto the tortilla along with cheese. Fold the tortilla over and allow it to cook until the cheese is melted. 

Leftover tips: I always have a lot left over, because I am cooking for 2. I like to make as many quesadillas that I can out of this recipe and wrap them in foil and either freeze or save for lunch. I also like to take the left over mixture and use it in salads if I don't want to make just quesadillas. 


Thursday, September 12, 2013

SGA all the way!


High school teachers often have to wear many different hats that carry many different responsibilities. Over the past nine years as a high school teacher, I have coordinated proms, served as cheer coach (I was never a cheerleader! I know nothing about it!), directed the Spanish club, and sponsored the Student Government Association (SGA). I have yet to coach football or the archery team, but I am just waiting for Mrs. Gibbs to make that request! All of these opportunities have taught me a multitude of lessons about character and endurance!

One of my most favorite organizations to sponsor is the Student Government Association. It is quite an honor to work with some of the brightest leaders in my school. At Sardis, I am trying to implement an SGA that does more than listen to student complaints or host school dances. I want my students to learn the importance of putting other's needs before their own. I do not ever want my SGA to become a popularity contest that results in the praise of one student's performance. 

The SGA election process can be quite tedious, because it allows me to see who the students really are. If a student really wants to be a part of SGA, he/she will have to put in a little work to even get his/her name on the ballot. Here is my SGA election process: 

Step 1: Meet with interested students and explain the goals/expectations of the SGA. 
Step 2: Interested students receive application packet that requires 3 teacher recommendations. 
Step 3: After the application packet it is turned in, students are interviewed by a teacher committee. 
Step 4: Once the students have all been interviewed, the teacher committee decides which students get to continue onto the campaign portion of the elections. 
Step 5: Students are allowed to make 3 posters to place in designated areas within the school two days prior to the elections. 
Step 6: Each student must film a 1-2 minute speech that will be shown to every English class. 
Step 7: Vote! The student body votes on their choice for each office during English classes. 

Like I stated before, it is my goal to create an SGA that serves the student body and the faculty of the school. After SGA elections, I always meet with my new governing body and set up some goals for the school year. Here are some of our goals thus far: 

1. School beautification- Sardis is a very large school building with a very large student population. We have wonderful janitors/staff that work very hard to make our school a clean environment. I know that they carry a very large burden on their shoulders, so the SGA is going to work with them to make our school even more beautiful than it already is. We are going to take charge of the outside flower beds, assist in cleaning up the lawns, and help keep the hallways nice and neat. 

2. Teacher appreciation- The SGA has many surprises in store for Teacher Appreciation Week this year! Teaching can be such a thank-less job, so spending one week out of the school year letting each teacher know how important he/she is to our student body will be quite an honor! 

3. Student needs- In every school there are students who cannot afford the basic necessities to make through a school year. While there are many great organizations in the Sardis community that work with families to provide basic things like food an clothing, basic school needs like jumpdrives and notebook dividers are forgotten in the shuffle. It is my hope that the SGA can raise money to keep basic items in our counselor's office so that students can have access to what they need each year. 

These are just a few of my SGA goals/ideas. There are so many more to come in the current school year, so I know I will be blogging about them! Because my candidates this year have done a WONDERFUL job at creating posters, I am going to share some below! Enjoy! 


Wednesday, September 11, 2013

Crazy Weeks Call for Easy Recipes!

The past two weeks have been nothing less than crazy at school and the Hayes' household. From getting adjusted to a new sleep schedule to having strep throat twice in a matter of twelve days, it seems like I am running 90 miles an hour every single day just to stay an inch ahead. I knew that becoming an AP Language teacher was going to be a challenge, I just didn't know that it would consume my every thought almost every day. I spend many nights and early mornings studying my AP lessons, so I often get behind on so many things in my "real" life. Because I love schedules, calendars, and lists, I hate it when my list for each day doesn't get finished and it pours over into the next day. Unfortunately, cooking and grocery shopping sometimes gets pushed to the bottom of my weekly lists. 

Cooking at least 3-4 times a week is one of my top priorities in my "real" life. I really love to cook, but I don't always have time in the evenings to cook super-involved meals. I am very blessed in that my dear husband, Justin, knows his way around the kitchen and is always willing to help with dinner, but I really enjoy being the "cook" at our house. We make it a priority to eat dinner together at minimum of four nights a week, so that we can discuss our daily lives and just enjoy each other's company. As a result of my new crazy-hectic schedule, I have been researching new and easy ways to cook a healthy and balanced dinner for us that doesn't require hours of prep or pre-planning. One of my latest finds has truly changed my cooking life! Here are a couple of recipes/tips that have revolutionized my meal planning: 

Crock Pot Baked Potatoes

I have seen numerous Pinterest pins with this idea, but have always been afraid to try it for absolutely no reason at all! I don't know if it just seemed "to-good-to-be-true" or that I just didn't want to change my potato-cooking ways. Here is how it works: 

Ingredients: 
3-4 large baking potatoes (or sweet potatoes!)
aluminum foil
kosher salt
olive oil 

Step 1: Wash and dry the potatoes
Step 2: Spray/cover in olive oil, then add a little pinch of salt to cover the potatoes
Step 3: Wrap in aluminum foil
Step 4: Place in crock pot (they can be arranged on top of one another!) 
Step 5: Cook on low for 7-8 hours

The potatoes I made last night were soooo wonderful! They were cooked just right and were easy to serve right out of the crock pot. I had put my barbecue chicken freezer meal in my other crock pot, so when I got home, all that I had to do was remove my potatoes, shred my chicken, and serve it up as a "chicken in a potato patch!" They were de-lish!

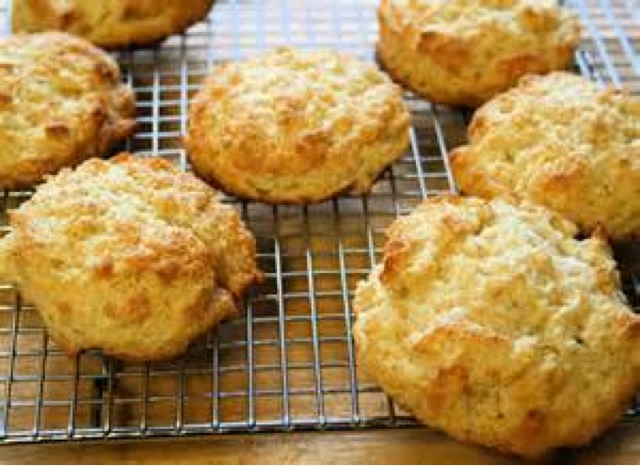
Justin's Quick and Easy Biscuits

As I said earlier, I have had strep throat twice in a matter of 12 days. Justin was not going to let me or himself go hungry, so he took over the cooking duties a couple of times last week. One night, he decided to make breakfast-for-dinner and whip up some quick and easy biscuits. They were so good! 

Ingredients: 
1/3 cup of butter (cut up)
2c self-rising flour
3/4 cup of buttermilk
1 tbsp butter melted

Directions: 
Preheat oven to 425
Place flour and cut-up butter in a bowl. Using a knife or fork, blend together butter and flour until mixture is crumbly with large chunks of butter. 
Stir in buttermilk 
Turn dough out onto a lightly floured surface, knead several times. 
Pat or roll out to 1/2 or 3/4 inch thickness. 
Cut with a 2 1/2 inch cutter or a simple cup will do! 
Place on lightly greased baking sheet and bake for 12 to 14 minutes
Once biscuits are cooked, glaze melted butter on top